
. Check How to Setup Google Public DNS over TLS on Android phones.)

Google announced that their public DNS will now support transport layer security (TLS). DNS over TLS is a security protocol for encrypting and wrapping DNS queries and answers via the Transport Layer Security (TLS) protocol. The goal of this is to contain a standard way to secure and maintain the privacy of DNS traffic between users and the resolvers. Check How to Setup Google Public DNS over TLS on Android phones.
Google Public DNS over TLS now available on Android 9 Pie and can be found Private DNS setting in network settings. The user needs to set DNS provider to dns.google. Just like Cloudflare’s 1.1.1.1 DNS this can also be work without root or VPN and goes by the IP address 8.8.8.8. Older versions of Android do not have native DNS-over-TLS support.
To use Google Public DNS, you need to explicitly change the DNS settings in your operating system or device to use the Google Public DNS IP addresses. Before you change your DNS settings to use Google Public DNS, be sure to write down the current server addresses or settings for backup purpose.
“Starting today, users can secure queries between their devices and Google Public DNS with DNS-over-TLS, preserving their privacy and integrity,” the company wrote in a blog post. “We implemented the DNS-over-TLS specification along with the RFC 7766 recommendations to minimize the overhead of using TLS. These include support for TLS 1.3 (for faster connections and improved security), TCP fast open, and pipelining of multiple queries and out-of-order responses over a single connection.”
How to Setup Google Public DNS over TLS on Android
Setting up Google DNS over TLS on Android is very simple. All you need to change your DNS setting under the Network and internet tab on your mobile. Follow below steps to Setup Google Public DNS over TLS on Android.
- Your device should be running on Android 9 Pie or later (older device does not support DNS-over-TLS).
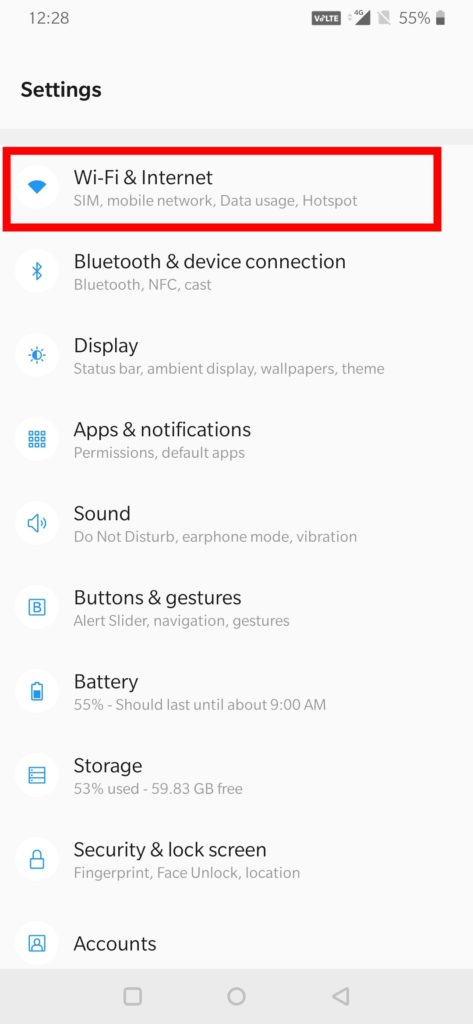
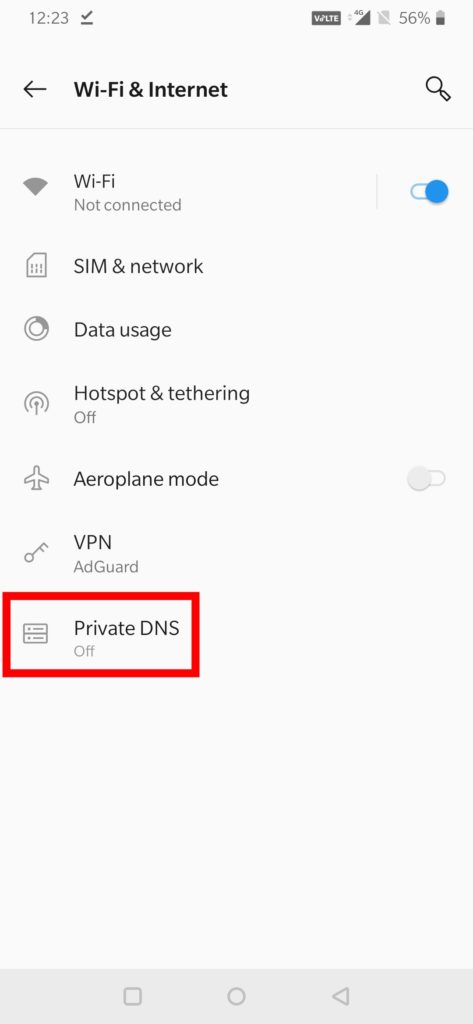
- Open Settings > WIFI & internet settings (or Network & Internet) > Private DNS.
- For Samsung Galaxy devices go to Settings > Connections > More connection settings > Private DNS
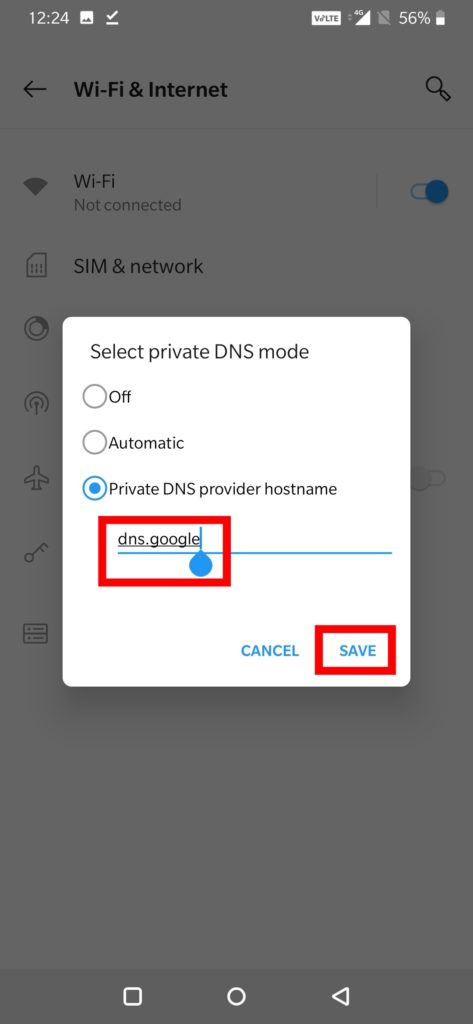
- In the popup window, select Private DNS provider hostname.
- Enter dns.google the hostname of the DNS provider.
- Click Save.
Setup Google Public DNS 8.8.8.8 at WIFI Routers
- Open your browser and enter the IP address (most probably 192.168.1.1)to access the router’s administration page.
- Enter the password to access network settings.
- Go to Network > Advance and Find the screen DNS server settings.
- If there are IP addresses specified in the fields for the primary and secondary DNS servers, write them down for future reference.
- Replace the addresses with the Google IP addresses:
For IPv4: 8.8.8.8 and/or 8.8.4.4
For IPv6: 2001:4860:4860::8888 and/or 2001:4860:4860::8844
- Save and exit.
- Restart your browser.
Wrapping Up:
If you an Android user running on Android Pie, you must setup Google Public DNS over TLS. Like HTTPS, DNS over TLS uses the TLS protocol to establish a secure channel to the server. Enabling the setting will not only make your browsing experience faster but also make your device secure.